Removing a sliding window may seem like an intimidating task, but with the right tools and instructions, it can be quite manageable. Whether you need to replace a broken window or simply want to clean the inaccessible parts, knowing how to remove a sliding window is a useful skill.
This guide will provide step-by-step instructions to ensure you can perform this task safely and efficiently.
There are several reasons you might need to remove a sliding window. One common reason is to replace a damaged or old window with a new one to improve your home’s appearance and energy efficiency.
Another reason could be to facilitate thorough cleaning of areas usually inaccessible when the window is installed. Lastly, you might need to remove the window during home renovations or to make way for a larger window or door installation.
Safety Precautions
Wear Appropriate Safety Equipment
When removing a sliding window, it’s crucial to prioritize your safety by wearing appropriate protective gear. This includes a pair of thick gloves to protect your hands from sharp edges, safety glasses to guard against hazardous debris, and sturdy footwear to prevent any injuries from accidental drops or slips.
Clear the Area of Obstructions
Before you start, ensure the area around the window is clear of any obstructions. Remove any furniture, decorations, or other items that could hinder your movement or pose a risk of damage or injury.
This not only provides you with ample space to work but also makes the process smoother and safer.
Ensuring the area around the window is clear of obstructions is a crucial step in the window removal process. By keeping the workspace tidy, you are minimizing the risk of accident or injury.
Any loose objects or unnecessary items in your vicinity could become potential hazards, especially if they are fragile or have sharp edges.
Furthermore, removing obstructions allows for more efficient movement and operation during the actual window removal. It provides a clear path for you to maneuver, and in case the window needs to be immediately set down, a cleared area can serve as a suitable spot.
Therefore, it is advised to take a few extra minutes to prepare and clean the area where you will be working. This simple act can significantly enhance your safety and the efficiency of the task.
Having a clutter-free workspace is not just about physical safety, but it also helps in reducing stress and creating a focused environment.
Initial Preparations
Gather Necessary Tools
To remove a sliding window, you’ll need the following tools:
- Screwdriver: To loosen the screws securing the window in place.
- Pry Bar: To gently lift the window from its frame.
- Utility Knife: To cut through any adhesive or paint that may be holding the window.
- Tape Measure: To accurately measure the window dimensions.
- Plastic Sheet: To cover the opening after the window has been removed.
- Hammer: Tap the pry bar if required.
- Ladder: If the window is high up, ensure you have a stable ladder to reach it safely.
Examine the Window’s Design
Before you start the process of removing the sliding window, take a moment to examine its design. Look for any distinct features or additional fixtures such as security locks or child safety devices.
Understand how the window slides within its track – does it move vertically or horizontally? Identifying whether your window is a single-hung, double-hung, or sliding window will help you determine the correct removal method.
Make a note of any screws or fastenings that may need to be removed during the process. Observing these details will ensure a smooth removal process, preventing any damage to the window or the surrounding structure.
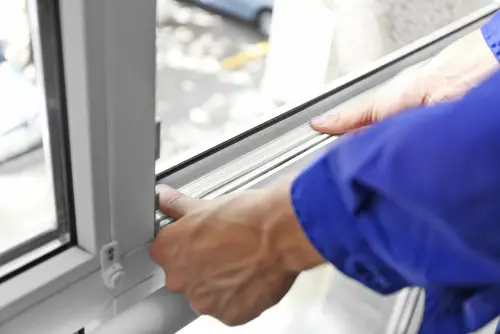
Unfastening the Window
Locate and Remove the Stopper

The first step to unfastening the sliding window is to locate the window stopper, a device that prevents the window from sliding out of the track. This is typically found at the top or bottom of the window track.
Once located, use the screwdriver to remove the screws holding the stopper in place. Be sure to keep these screws in a safe place as you may need them during reinstallation. Removing the stopper will allow the window to slide freely out of the track in the next steps.
Slide and Swing Out the Window
Once the stopper has been removed, you can now slide the window. Shift the window as far as it can go towards the open side of the track. Now, carefully swing out the bottom part of the window towards you and lift it.
The window should now be out of its bottom track. Gradually, raise the window, freeing it from the top track as well. Be sure to have a good grip as you wouldn’t want the window to fall accidentally.
If the window feels too heavy or if it’s a large window, seek help from another person to ensure a safe and successful removal.
Removing the Inner Window

Slide the Other Half of the Window
After successfully removing the first half of the window, shift your focus to the other half that is still in place. Ensure it is unlocked, then slowly and carefully slide it toward the side where the first half was located.
Do this until it reaches the point where it can be swung out from the bottom, similar to the first half.
Lift Out the Inner Window
With both halves of the window slid to one side, you can now proceed to remove the inner window. To do this, grip the window firmly and carefully swing the bottom out towards you.
Then, lift the window upwards out of the bottom track, and finally, guide it out of the top track. As with the first window, if this one is too heavy or large, consider getting assistance to prevent accidents or damage to the window or structure.
Related Topics:
Final Cleanup
Inspection of the Window Frame
After removing the windows, it’s important to conduct a thorough inspection of the window frame. Check for any signs of wear and tear, such as cracks, rot, or damage from water or pests.
Assess whether it simply needs cleaning and minor repairs, or if a replacement is necessary. If you spot any issues, you may need to contact a professional to conduct further inspections and recommend appropriate solutions.
Proper Disposal of the Old Window
Once you’ve safely removed and inspected the window frame, it’s time to properly dispose of the old window. Different regions have different regulations regarding the disposal of construction waste, so contact your local waste management facility to understand the best practices for disposal in your area.
If the window is in good condition, consider donating it to a local charity, selling it, or repurposing it for other projects.
Replacement Options
Considerations for New Windows
When choosing a new window, there are several factors to take into account. Firstly, consider the size and shape of the window opening to ensure a proper fit. Secondly, the style and design of the window should be in harmony with the overall aesthetic of your home.
Energy efficiency is another crucial aspect, as windows with good thermal performance can significantly reduce energy costs.
Lastly, consider the material of the window. Each material, be it wood, vinyl, aluminum, or fiberglass, comes with its own set of benefits and drawbacks related to durability, maintenance, and cost.
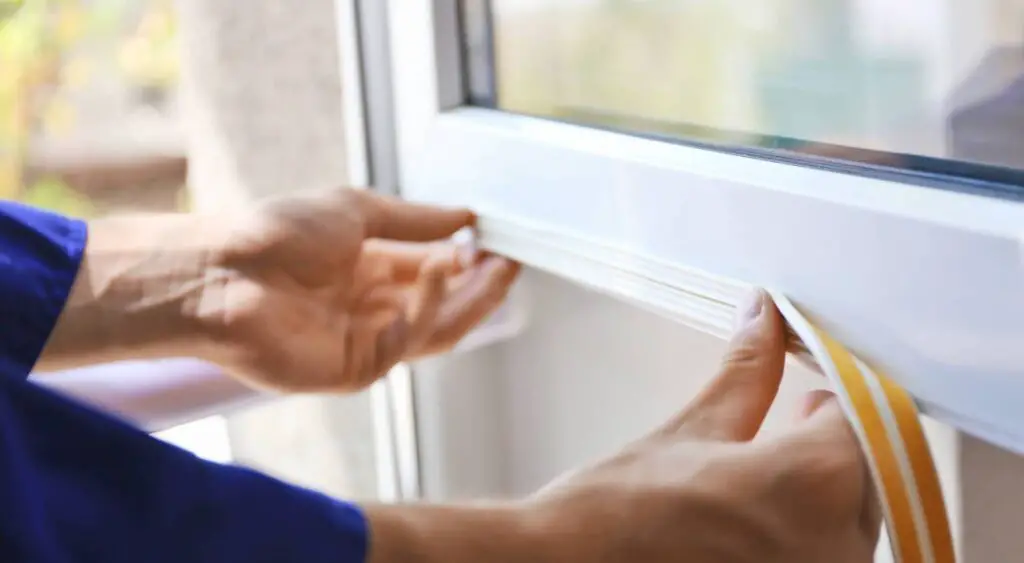
Installation of the New Window
The process of installing a new window begins with ensuring the window opening is clean and free from any debris. The new window should be dry-fitted first to confirm it fits correctly into the opening.
Once confirmed, apply a suitable sealant to the window frame’s edges to create a waterproof barrier. Next, carefully place the new window into the opening, making sure it sits flush with the frame.
Use shims to adjust its position if necessary. Secure the window in place with screws, and make sure it opens and closes smoothly. Finish by applying insulation around the window to prevent drafts and seal any gaps.
Conclusion
The process of removing a sliding window is not as daunting as it may seem. With a clear understanding of the window’s design, the right tools, and a methodical approach, you can easily remove your sliding window for replacement, cleaning, or other purposes.
It’s essential to prioritize safety during this process and ensure the area is free of obstructions. Remember to carefully inspect the window frame after removal and correctly dispose of the old window.
The installation of a new window could be your next DIY project, considering factors such as energy efficiency, material, and design that align with your home’s aesthetics. With this knowledge at your disposal, the task of removing a sliding window can be both manageable and rewarding.
FAQs
What tools are required to remove a sliding window?
The primary tools required to remove a sliding window include a screwdriver, pry bar, utility knife, safety gloves, and protective eyewear. It’s important to use the right tool for each task to prevent damage and ensure your safety during the process.
Can I install a new window myself, or should I hire a professional?
While installing a new window can be a DIY project, it requires a certain skill level and understanding of the process. If you’re confident in your abilities and have the necessary tools, you can perform the installation yourself. However, hiring a professional might be more suitable for complex window models or if you’re not comfortable with the task. It’s always important to prioritize safety and quality workmanship.
1 thought on “How To Remove Sliding Window Safely and Efficiently”