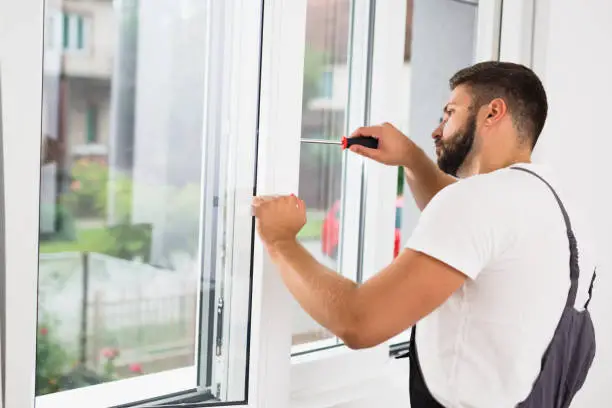
Wooden windows, while elegant and charming, can sometimes get stuck due to various reasons such as paint build-up, seasonal changes, or even humidity. This can prove to be a nuisance, especially when you need to open or close your windows for ventilation.
While it might seem like a daunting task, fixing a stuck wooden window is a doable DIY project. In this guide, we will walk you through simple and effective steps to free up your stuck wooden windows without causing any damage.
As mentioned earlier, there can be many reasons why your wooden windows might get stuck. One of the most common reasons is paint build-up. Over time, layers of paint can accumulate and make it difficult for your window to open or close smoothly.
Additionally, seasonal changes can cause wood to expand or contract, resulting in a tight fit that makes it hard to move the window. Lastly, high humidity levels can also cause the wood to swell, making it harder for your window to slide open or shut.
Safety Precautions
- Wear protective gear such as gloves and safety glasses.
- Use caution when handling tools to avoid injuries.
- Make sure the area around the window is clear of any obstacles.
- Work on a stable surface to prevent accidents.
Required Tools and Materials
- Hammer
- Pry bar or putty knife
- Sandpaper
- Silicone lubricant or candle wax
- Screwdriver
- Wood shims (if necessary)
- Paint stripper (if paint build-up is the issue)
- Paintbrush (if using paint stripper)
- Rags or paper towels
- Safety glasses
- Gloves
- Drop cloth or tarp to protect the surrounding area.
Identifying the Problem
Examine the Window: Start by visually inspecting the window for any clear signs of damage or obstruction. Look for cracked glass, damaged frames, or objects lodged in the track.
Check for Paint Build-up: If the window frame is painted, check for excessive layers of paint that may be causing the window to stick. This can be identified by uneven or rough surfaces on the frame.
Test for Swelling: If you suspect wood swelling due to humidity, feel for areas where the window frame seems tighter or harder to move.
Look for Seasonal Changes: Depending on the season, wood can expand or contract. If your window is stuck in winter, it may be due to the wood contracting in the cold.
Identify Other Issues: If you can’t find a clear cause, it could be a hardware issue. Check the condition of the window’s hinges, handles, and locks. They should be functioning smoothly and not causing any hindrance in the movement of the window.
Fixing Paint-Sealed Windows

If the issue with your stuck window stems from paint build-up, the following steps will guide you on how to rectify it:
Safety Preparations: Before beginning, put on your safety glasses and gloves to protect your eyes and hands from potential paint chips or dust. Lay down a drop cloth or tarp around your work area to catch any debris and keep your space clean.
Apply Paint Stripper: Using a paintbrush, generously apply paint stripper to the painted areas of the window frame. Be sure to cover all the painted surfaces, focusing specifically on the edges where the sash meets the frame. The paint stripper will soften and dissolve the layers of paint.
Wait and Scrape: Allow the paint stripper to sit on the window as per the manufacturer’s instructions. It generally takes around 20-30 minutes. Once the paint begins to bubble, use your putty knife or pry bar to gently scrape off the paint. Be careful not to damage the wood underneath.
Repeat if Necessary: If there are still layers of paint left after your first attempt, repeat the process. It may take a few rounds of applying stripper and scraping before you reach the bare wood.
Sand the Window Frame: Once you’ve removed all the excess paint, use sandpaper to smooth the wood. Start with a coarse-grit sandpaper to remove any remaining paint or rough patches, then finish with a fine-grit sandpaper for a smooth finish.
Clean and Lubricate: After sanding, clean the window thoroughly to remove any dust or residue. Once clean, apply silicone lubricant or candle wax to the sliding areas of the window. This will make the window easier to open and close.
Remember to test your window operation at every step. This way, you can identify when the issue has been resolved and avoid unnecessary work. When finished, your window should slide open and close easily, free from the constraints of excess paint.
Fixing Swollen Wood

Swollen wood is a common problem, especially in regions with high humidity or during the rainy season when wooden doors, windows, and furniture absorb the excess moisture in the air and expand.
Identify the Affected Area: The first step in addressing this issue is to identify the areas that are swollen. This is usually evident when doors or windows are challenging to open or close, or when furniture joints appear misaligned.
Remove the Paint or Finish: If the swollen wood has been painted or varnished, you’ll need to remove this coating to allow the wood to breathe. You can accomplish this with a paint stripper or sandpaper, similar to the process used for removing paint from a window frame.
Dry The Wood: Once the finish is removed, you need to dry the wood. This can be done naturally over time or expedited with a hairdryer or fan. Ensure there is adequate ventilation to aid the drying process.
Sand Down the Swollen Area: After the wood is dry, use sandpaper to sand down the swollen areas. Start with coarse-grit sandpaper, then move to a finer grit for a smooth finish.
Apply a Sealant: Once the wood is back to its original size and smooth, it is critical to apply a waterproof sealant. This sealant creates a barrier that prevents moisture from swelling the wood in the future.
It’s essential to be gentle throughout the entire process to avoid damaging the wood further. With patience and care, you can restore the original form and function of your wooden fixtures and furniture.
Fixing Loose Window Frames

Loose window frames can be a gateway to drafts, dampness, and even pests in your home. Addressing this issue promptly can save on energy costs and prevent further damage.
Inspect the Frame: Begin by examining the window frame to identify the loose sections. It’s not uncommon for the screws or nails holding the frame to the wall to loosen over time. If this is the case, you may notice the frame moving when gently pushed.
Tighten Screws or Nails: If you find loose screws, tightening them with a screwdriver can often solve the problem. If the frame is held in place by nails, you may need to gently hammer the protruding nails back into place. Always be careful not to damage the frame or glass in the process.
Check for Rot: Wooden window frames can become loose due to rot. If you notice any soft or crumbling wood, this might be the issue. Rotted wood needs to be removed and replaced to ensure the frame’s overall integrity.
Replace Damaged Wood: If you’ve identified rotten wood, carefully remove it without damaging the surrounding healthy wood. You can then replace it with a new piece, ensuring it fits snugly and is secured with screws or nails.
Seal and Finish: Once the frame is secure, it’s time to seal any gaps and finish the frame. Applying a generous amount of waterproof sealant can close gaps and protect the wood from moisture. Once the sealant has dried, paint or varnish the frame to match your decor and provide an extra layer of protection.
Related Topics:
Maintenance and Prevention
Regular maintenance of your window frames can prevent issues such as drafts, dampness, and pest infestation. Here are several preventive steps:
Routine Inspection: Make it a habit to inspect your window frames regularly. Look for signs of wear and tear, such as loose screws or nails, rotting wood, or chipped paint. Fix any minor issues before they escalate.
Cleaning: Keep your window frames clean. Dirt and grime can accumulate over time, leading to damage. Use a soft cloth and a gentle cleaning solution to wipe your frames.
Sealing: Ensure the sealing around your window frames is intact. Small cracks or gaps can appear over time, so reseal as needed to keep your frames weatherproof.
Painting: Applying a fresh coat of paint or varnish to your window frames not only improves their appearance but also provides a protective barrier against moisture and pests.
Professional Inspection: If your window frames are old or you suspect serious damage, consider hiring a professional for an inspection. They can provide comprehensive maintenance and suggest appropriate repairs or replacements if necessary.
Conclusion
Window frames are an essential part of any home, providing structural support and protection from the elements. With proper installation and regular maintenance, you can prolong the lifespan of your window frames and keep your home safe and comfortable.
Remember to always follow safety precautions when working with tools or chemicals, and consider seeking professional help if needed. By taking care of your window frames, you can prevent costly repairs and ensure your home remains pest-free.
So, make sure to inspect, clean, seal, and paint your window frames regularly to keep them in top condition and enjoy a beautiful, safe home for years to come.
FAQs
How often should I inspect my window frames?
It is recommended to inspect your window frames at least once a year for any signs of damage or wear and tear.
Can I use any cleaning solution on my window frames?
No, it’s important to use a mild, non-abrasive cleaning solution specifically designed for windows to avoid causing damage.
Should I seal my window frames after cleaning them?
Yes, sealing your window frames can help prevent moisture and pests from entering and prolong the lifespan of your frames. Remember to use a sealant specifically designed for windows and follow the manufacturer’s instructions.

2 thoughts on “How To Fix Stuck Wooden Windows: Safely”