A leaking window can be a major nuisance, particularly during a heavy rainstorm when water is seeping into your home causing potential damage. Not only does it pose a risk of damage to the surrounding structure, but also it impacts the overall comfort and indoor air quality.
While a permanent fix involves professional intervention, there are ways to implement a temporary fix for a leaking window that can keep the problem at bay. This guide will walk you through a series of steps to help you tackle this common household problem.
Identify the Source of the Leak
To locate the exact spot of the leak, start by wiping the window dry with a towel. This makes it easier to identify where new moisture starts to appear. Look for signs of water penetration in the area around the window.
This could be discoloration, peeling paint, or swelling of the wood or drywall. Pay close attention to the corners of the window, where the window meets the wall and the seal around the glass pane. If you’re unable to spot the leak during a dry period, try recreating the leak with a garden hose.
Start from the bottom and slowly work your way up, checking for signs of water inside.
Performing a comprehensive examination will ensure that you correctly pinpoint the origin of the leak, an essential step before moving forward with your temporary fix.
Clean the Area

Once you’ve identified the source of the leak, it’s crucial to clean the area thoroughly. Use a mild cleaning solution – a mixture of warm water and a small amount of dish soap works well.
This will help eradicate any dirt, grime, or mildew that may have formed, as these can exacerbate the leak and make any sealing efforts less effective.
Apply the cleaning solution with a soft cloth or sponge, gently scrubbing the area to dislodge any particles. Be sure to clean the surrounding areas as well, as water can travel along unexpected paths.
After cleaning, pat the area dry with a clean towel and then, importantly, allow it to air dry fully. This may take some time, so be patient. The area must be completely dry before proceeding with the temporary fix, as any lingering moisture can undermine your efforts to seal the window effectively.
Apply a Temporary Sealant

To temporarily fix the leak, you can use a silicone-based sealant or waterproof tape, both readily available from most hardware stores.
Silicone-based sealants are especially effective as they are inherently waterproof, flexible, and adhere well to glass and most types of wood or masonry. To use it, cut the tip of the tube at a 45-degree angle and use a sealant gun for a smoother application.
Apply it directly onto the leak, making sure to cover all the cracks or gaps. Smooth it out with a sealant smoothing tool or your finger, ensuring the sealant gets into all the nooks and corners.
Waterproof tape, on the other hand, is an equally effective temporary solution to a leaking window, especially for larger leaks.
Make sure the surface is dry before application. Cut the tape to the desired length, remove its backing, and apply it directly over the leak.
Smooth it out from the center towards the edges to remove any air bubbles and ensure a tight seal. Remember, these are temporary solutions, and while they can stop the leak, you will need a more permanent solution in the long run.
Temporary Sealant Application
Applying a temporary sealant involves a few key steps. After ensuring the area is completely dry, apply the sealant evenly along the edge of the window where the leak originates, making sure to cover all possible entry points for water.
It’s important to follow the manufacturer’s instructions regarding drying or curing time, which can vary between products.
After the sealant has dried, check to see if the leak has been successfully sealed by recreating the leak conditions, such as with a garden hose. If water continues to enter, you may need to reapply the sealant or seek professional assistance.
Always remember that a temporary fix is just that – temporary. It’s always advisable to seek a long-term solution to prevent extensive water damage to your property.
Check for Effectiveness
After the sealant has dried and cured, it’s critical to test the effectiveness of your temporary fix. Start by pouring a small amount of water into the area where the leak was initially detected.
You can use a water bottle with a controlled flow or a small watering can for this test.
Ensure to pour the water slowly and steadily, mimicking the pattern of rainfall as much as possible.
As you pour, watch the interior side of the window closely for any signs of leakage. Look for water droplets or moisture along the area where the sealant was applied.
If the sealant holds and no water penetrates the interior, congratulations, your temporary fix is successful. However, if you notice any water seeping through, it indicates that the sealant has not completely sealed off the leak.
In this case, you might need to reapply the sealant, ensuring it covers all possible gaps, or consider seeking professional help for a more permanent solution.
Remember, while the temporary fix is useful in preventing immediate water damage, a long-term solution is integral to maintaining the structural integrity of your property.
Monitor the Window
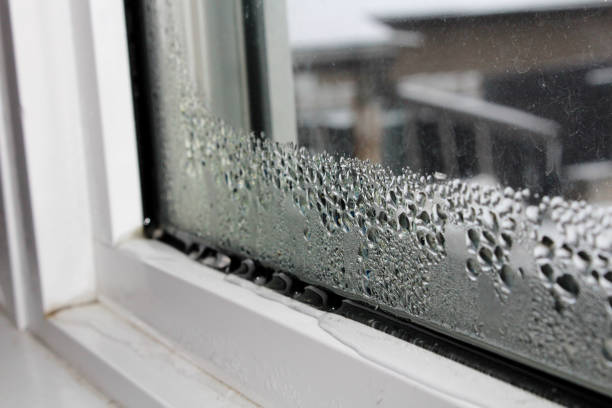
Once your temporary fix is in place, vigilant monitoring becomes crucial, especially during periods of rain. Pay close attention to the sealed area for any signs of water intrusion.
Watch for dampness, condensation, or water droplets forming on the inside of the window. This vigilance will allow you to catch any failures of the temporary sealant early, enabling timely reapplication or the pursuit of a more permanent fix.
Related Topics:
Conclusion
In conclusion, managing a leaking window can be a daunting task, but with a keen eye and the right tools, a temporary fix is achievable. Identifying the source of the leak, ensuring the area is clean and dry, and applying a suitable temporary sealant are all steps that can help mitigate water damage in the short term.
However, these temporary solutions are not long-term fixes. Thorough monitoring of the area is crucial to catch any recurrence of the leak, and professional repair or replacement is ultimately necessary to protect your home’s structural integrity.
Remember, while a temporary fix can provide immediate relief, it is not a substitute for a more permanent solution.
FAQs
What are some common causes of window leaks?
Window leaks are often caused by several factors ranging from poor installation, cracks or gaps in the window sealant, faulty or damaged window frames, and even extreme weather conditions. It’s essential to identify the cause of the leak to apply the most effective solution.
Can I use household items for a temporary fix of a leaking window?
Yes, certain household items like duct tape or plastic sheeting can serve as a temporary fix for a leaking window. However, these are only short-term solutions and can’t substitute professional repair or replacement.
How long can a temporary fix on a leaking window last?
The longevity of a temporary fix can vary significantly depending on the materials used and the severity of the leak. However, it is not designed to be a long-term solution, and professional repair or replacement should be sought as soon as possible to prevent further damage to your property.
1 thought on “Temporary Fix For Leaking Window: Guide”