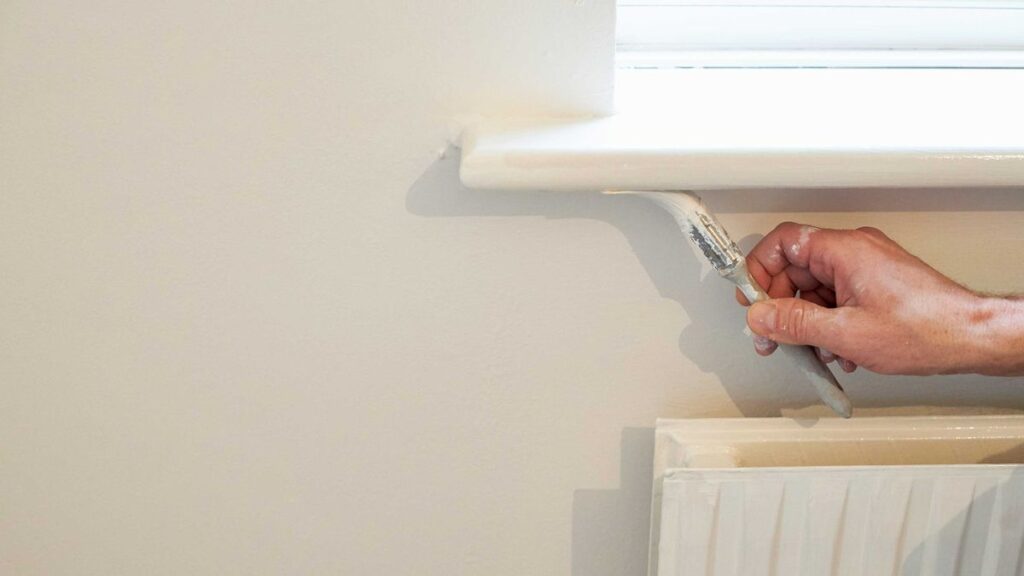
Painting wooden window frames is a simple yet effective means to revamp your home’s aesthetics and protect the wood from weather elements.
This guide will provide you with step-by-step instructions on how to paint wooden window frames, ensuring a professional-looking finish that elevates the overall appearance of your home.
Whether you’re a DIY enthusiast or a homeowner looking to undertake some home improvement, this guide will serve as a useful resource to tackle this task efficiently.
Materials and Tools Needed
You will need the following materials for this task:
- A good-quality primer: This will help seal the wood and provide a smooth base for the paint.
- Paint: Choose a high-quality exterior paint in your color preference.
- Brushes: You will need a variety of sizes, including a smaller brush for detailed work.
- Sandpaper: This is to smooth the surface of the window frames before painting.
- A dust mask and safety goggles are necessary for protection while sanding.
- Painter tape: To protect the glass and walls surrounding your window frames from accidental paint splatters.
- A drop cloth or newspapers: To protect your floors.
- A paint scraper and putty knife: For removing old paint and smoothing putty or filler.
- Wood filler (optional): Useful for repairing minor cracks or holes in your frames.
Preparation

Instructions
Before you dive into painting, it’s crucial to prepare your window frames properly. This involves cleaning, sanding, and priming the wood, setting the stage for a flawless paint job.
Cleaning
Start off by thoroughly cleaning your window frames. Use a damp cloth to remove any dust, dirt, or cobwebs from the frame. If there’s any mold or mildew, a solution of 1 part bleach to 3 parts water will be effective.
Apply the solution with a sponge, let it sit for a few minutes, then scrub gently with a brush and rinse. Allow the frame to dry completely before moving to the next step.
Sanding
Once the window frame is clean and dry, it’s time to sand. Wearing a dust mask and safety goggles, start sanding the frame using medium-grit sandpaper. This will remove any loose or flaking paint and smooth out rough spots, creating an ideal surface for the primer to adhere to.
Be sure to sand along the grain of the wood, not against it. After sanding, wipe the frame with a damp cloth to remove any dust.
Repair and Sand Again
If there are any holes or cracks in the frame, now is the time to repair them. Use a putty knife to apply wood filler, smoothing it out as much as possible. Once the filler has dried, sand it down until it’s level with the rest of the frame. Wipe off the dust with a damp cloth afterward.
Applying Painter’s Tape
The final step in the preparation phase is to apply painter’s tape to the glass and walls around the window frame. This will prevent these areas from getting painted accidentally.
Priming
After the preparatory steps, you’re now ready for the priming phase. Begin by stirring your primer thoroughly to ensure it’s well-mixed. Using a high-quality paintbrush, start applying the primer to the window frame.
Start from the top and work your way down to prevent drips. Brush on a thin, even layer, making long smooth strokes along the grain of the wood.
To prevent drips or pooling, avoid overloading your brush with primer. If you notice a drip forming, catch it quickly with your brush and smooth it out.
Remember, the key is to apply thin coats – it’s better to apply two thin coats than one thick one. Allow the first coat to dry completely as per the manufacturer’s instructions before applying a second one, if necessary.
Once the primer has completely dried, your window frames are ready for paint. Remember to remove the painter’s tape before the primer dries completely to prevent it from peeling off with the tape.
Painting

1. Choosing the Paint
The first step is to choose the right kind of paint. For window frames, a semi-gloss or gloss finish is typically recommended, as they are more durable and easier to clean. Choose a high-quality acrylic latex paint for the best results.
2. Applying the First Coat
After you’ve chosen your paint, start with the first coat. Stir the paint thoroughly before you begin. Using a clean, high-quality brush, apply the paint in long, even strokes. Try to follow the grain of the wood as much as possible.
3. Ensuring an Even Coat
To ensure an even coat, avoid loading your brush with too much paint at once. If you have too much paint on your brush, it can lead to drips and uneven coverage. If you notice a drip, catch it quickly with your brush and smooth it out.
4. Letting the First Coat Dry
Once you’ve applied the first coat, it’s essential to let it dry fully before proceeding with the second coat. The drying time can vary based on the type of paint you’re using, so refer to the manufacturer’s instructions.
5. Applying the Second Coat
After the first coat has dried, you can apply the second coat. Follow the same process as with the first coat, ensuring that you apply the paint in long, even strokes. Again, make sure to let this coat dry completely.
6. Final Touches
After the paint has dried, you can remove any remaining painter’s tape. If any paint has gotten onto the glass, you can scrape it off carefully with a razor blade.
With these steps, you should be able to paint your window frames effectively and achieve a professional-looking result.
Related Topics:
Clean Up
Cleaning up after a painting project is an integral part of the process. It is essential to clean your brushes thoroughly to extend their lifespan and maintain their quality. Run your brushes under warm water, using a gentle soap to remove the remaining paint.
Work the soap into the bristles and rinse until the water runs clear. After rinsing, reshape the bristles and let the brushes dry completely before storing them.
When it comes to disposing of used painting materials, it’s crucial to do so responsibly. Paint cans should never be thrown in the regular trash. Instead, check with your local waste management facility to find out their guidelines for disposing of paint.
Some facilities offer drop-off locations for paint disposal, while others may require you to solidify the paint with a paint hardener before disposal. It’s also advisable to recycle as much as possible, such as empty paint cans and cardboard from packaging.
Maintenance
Maintaining your freshly painted window frames is essential to keep them looking new and prolong their lifespan. Regular cleaning is crucial to prevent dirt and grime from accumulating.
Use a soft cloth and a mild soapy solution to gently clean the frames. Avoid using harsh chemicals or abrasive materials that could damage the paint.
Inspection of your window frames should be done every year. Look out for signs of chipping, peeling, or fading paint.
These might indicate that it’s time for a new coat of paint. As a general rule, window frames should be repainted every 2-3 years, depending on the climate and exposure to the elements. However, good quality paint may last longer.
Furthermore, consider using a UV-protective sealant for your window frames. This can help protect the paint from fading and extend the time between repaints. Always ensure the window frames are thoroughly dry before applying any sealant.
Conclusion
In summary, painting wooden window frames not only enhances your home’s aesthetic appeal but also safeguards the wood from weather elements.
Through thorough preparation, careful selection of quality materials, and meticulous application, you can achieve a professional-looking finish that revitalizes your home. Regular maintenance, including cleaning and inspections, will help prolong the lifespan of your painted frames and maintain their fresh appearance.
The process might seem time-intensive, but the result is a rewarding transformation that brings a new lease of life to your home’s exterior. With this guide, both DIY enthusiasts and homeowners can confidently undertake this home improvement task and execute it with efficiency and precision.
FAQs
Can I paint my wooden window frames in any weather condition?
It’s important to choose the right weather conditions when painting your window frames. Avoid painting in extreme weather conditions. Too much heat can cause the paint to dry too fast, leading to cracks and bubbles, while too much humidity or cold weather can prevent proper drying.
How often should I clean my painted wooden window frames?
Generally, it is recommended to clean your window frames at least once every six months. However, if your home is in an area with a lot of dust or pollution, you may need to clean it more frequently to maintain its appearance and longevity.
What type of paint is best for wooden window frames?
As wooden window frames are exposed to the elements, it’s best to use high-quality, durable paint that can withstand weather changes. An acrylic latex paint with UV protection is usually a great choice, as it provides a durable finish and protects the wood from harsh sunlight.

1 thought on “How To Paint Wooden Window Frames: (Guide)”