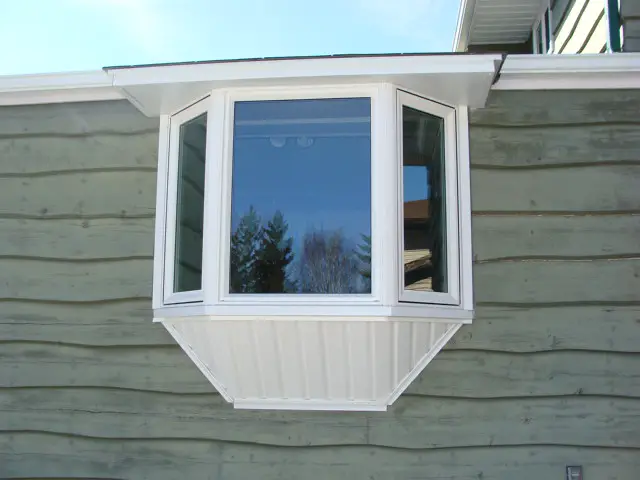
Are you looking to add a stylish, eye-catching feature to the exterior of your home? Look no further than installing a bay window. Bay windows have been around since medieval times and can be seen in homes all over the world today.
Not only do they provide a beautiful visual element to the front of your property, but they brim with great benefits too: better air circulation, extra floor space, more light intake and so much more!
If you’re ready to start on your own DIY project, we’ve got you covered! In this step-by-step guide, we’ll show you how to build sturdy support for any bay window structure.
With just some basic carpentry skills or even help from friends or family members if needed – it’s completely possible for those wanting an incredible new addition to their home at an affordable cost! So let’s get started, shall we?
Step 1: Measure Your Space
The first step to building your bay window support is measuring the space that needs to be filled. Make sure you measure each side (including any angles) and write down these specifications for later reference.
Once you have this information, you’ll be able to take it with you to the hardware store and purchase appropriate lumber for your project.
Step 2: Gather Supplies
Once all of your measurements are written down, it’s time to head out shopping! To build a bay window support, you’ll need some basic supplies such as wood screws, nails, saws, sander/sanding tools, drill/drill bits, screwdrivers, and more. Make sure you have plenty of these items on hand before starting the project.
Step 3: Cut the Wood
Now that you have your measurements and supplies, it’s time to get cutting! Using a saw, carefully measure and cut all of the pieces of wood needed based on your written measurements from earlier. Be sure to wear gloves and safety goggles while doing this step. This will help protect you from splinters and flying sawdust.
Step 4: Sand and Assemble
Once all of your pieces are cut, begin sanding them down to give a smooth finish. During this process, be sure to go over each piece several times with different grits to ensure an even finish throughout.
Once the pieces have been sanded, begin assembling them according to your original plans. Be sure to use screws and/or nails to secure each piece together firmly.
Step 5: Remove the existing window (If Needed)
If you are replacing an existing window with your new bay window support, begin by removing the old window. This can be done by unscrewing the screws that secure it to the wall and carefully taking it out. Once removed, proceed to step 6.
Step 6: Install
Once you have finished building the support frame for your bay window, it’s time to install it! Begin by laying the frame in its desired spot and marking where the holes should be drilled into walls or flooring.
Use a power drill and screws to mount the frame securely in place, then use caulk around any visible gaps between the frame and any wall or floor surface. You may also want to paint or stain your support frame after installation for added protection against moisture and wear and tear over time.
Related Topics:
Additional Tips:
• Make sure to measure twice before cutting any wood pieces so they fit together perfectly.
• Use sandpaper on all edges of the wood pieces for a smooth finish before assembly.
• Wear safety glasses when using power tools to avoid danger from flying debris.
• Apply sealant or paint to protect the wood from the elements.
• Have someone help if possible when installing the frame to ensure it’s secure.
Conclusion
By following these steps, you can easily build and install a support frame for your bay window. Doing this yourself is a great way to save money on hiring professionals and customizing the look of your home. Plus, it’s a fun and easy DIY project that will give you great pride in knowing you did it yourself! Good luck!
FAQs
Q. How long does it take to build a bay window support?
Depending on the complexity of your design and materials, it could take anywhere from one weekend to several weeks or longer.
Q: What holds up a bay window?
The window frame is usually held up by a combination of metal or wood braces and screws. If the bay window is large, however, you may need additional support from the wall studs or joists behind it.
Q: How much weight can a bay window support?
Generally speaking, most standard bay windows should be able to hold up to 200-300 pounds depending on the materials and construction. If your bay window design is very complex with multiple layers or different material types, you may need to consult an engineer for accurate loading information.
Q: Is bay window structural support?
Yes, the bay window frame should be considered part of the building structure. If it is not properly supported, it could lead to serious problems with the integrity and stability of the wall or ceiling that it’s attached to.
Q: What is involved in installing a bay window support?
The process of installing a support system for a bay window can vary depending on the size and complexity of your window design. Generally speaking, you will need to install wood or metal braces between the wall studs or joists behind the window and secure those braces with screws.
Make sure to use heavy-duty screws that are suitable for your material type and weight load requirements. Additionally, you may want to use brackets, a ledger, and other support mechanisms depending on the size of your window.
1 thought on “How To Build A Bay Window Support? (Guide)”